|

 
| |
General Maintenance
Technical Support
Print Tests
- Turn off the printer
- Press and hold the LF (Line Feed) button while turning the printer on.
Once printing starts release the LF button
- Press the SEL button to stop the test
- Examine the printout
You should see the following:
UTL 10 CPI [following by 4 lines of print]
UTL 12 CPI [following by 4 lines of print]
UTL 17 CPI [following by 4 lines of print]
HSD 10 CPI CPI [following by 4 lines of print]
HSD 12 CPI [following by 4 lines of print]
HSD 17 CPI [following by 4 lines of print]
UTL 10 CPI Double Width...
Connecting the Cash Drawer
- Turn off the printer
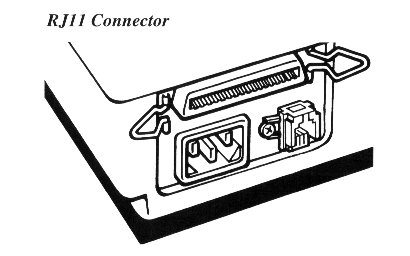
- Connect the cash drawer cable to the connector located on the back of the
printer
The cash drawer cable connector is an RJ11 (6-wire / silver satin)
connection
Cash Drawer Pin Assignments
- 1 - Drawer 2 Drive Signal (+24V 150ms): PLUS Models only:
Not used on Standard and Turbo models
- Ground
- Drawer 1 Drive Signal (+24V 150ms)
- Drawer 1 Status Switch Input (Optional)
- Ground
- Drawer 2 Status Switch: PLUS Models only
Not used on Standard and Turbo models
RS-232 Communication
- Up to 19.2K baud
- 2K ready buffer
- Ready/Busy or XON/XOFF Protocol
- Communications Diagnostic Mode
1 PG
2 TD
3 RD
4 RTS
6 DSR
7 SG
11 SSD
13 SG
20 DTR
Serial Cable Configurations
- Host (DB-25 Female) to Series 50 (DB-25 Male)
- 1 to 1
- 3 to 2
- 2 to 3
- 5 to 4
- 4 to 5
- 20 to 6/8
- 6/8 to 20
- 7 to 7
Adjusting the Platen Gap
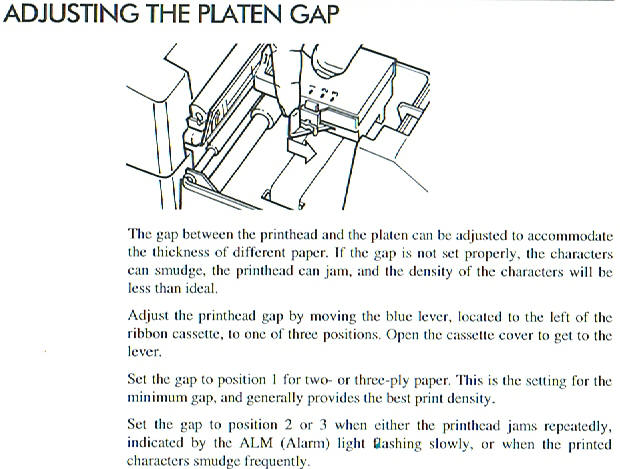
Remove the Journal Take-up Roll
- Remove the paper cover
- Press the SEL (Select) button
The SEL light will go off indicating that
the printer is off-line
- Press and hold the LF (Line Feed) button until two or three turns of blank
paper have been wound on the take-up spool assembly
- Lift the take-up spool assembly from the cradle and cut the paper below
the last entry.
- Unscrew the take-up flange (the flange without the gear)
- Slide the journal paper off the take-up core and put the journal in a safe
place.
- Screw the take-up flange back on
- Remove the journal supply roll
Parts
| Paper |
Receipt Paper
- Single Ply (3.25 inches wide, 3.5 inches diameter, 240 feet length)
Receipt-Journal Paper
- Double Ply (3.25 inches wide, 3.5 inches diameter, 125 feet length)
- Triple Ply (3.25 inches wide, 3.5 inches diameter, 85 feet length)
|
Ribbon Cassettes
- Ithaca Peripherals - Black 06-0560 (12/case)
- Ithaca Peripherals - Purple 100-1823 (12/case)
- Okidata - Black ML-172
- Okidata - Black ML-182
- Okidata - Black ML-192
|
Spindles
- Paper Core Spindle (Supply) 06-0680
- Journal Take-up Spool Assembly 06-0993
- Journal Take-up core 06-0597
- Journal Take-up flange 06-0599
|
Print Head
- Printhead 06-0565
- Printhead clamp 06-0571
|
|